I love performing deployments in Azure via Powershell. This saves time and simplifies your daily work in the operation of customers. Above all, it is an asset for IT service providers. This makes it possible to automate recurring tasks. So far I have always worked with the Powershell Console. Since Build 2020 I also work with Windows Terminal and most recently with Jupyter Notebook. And that’s what this blog post is all about. As an alternative, Microsoft presented Visual Studio Codespaces at Build 2020. It’s going in the same direction. The goal is that Dev Teams can work on code at the same time.
##
Jupyter Notebook is an open-source web application that allows you to create live code. to share with others, or to work on it at the same time. Jupyter Notebook does not support Powershell until March 2020. The tool is based on Python and can run both locally and in the cloud.
First I had PowerShell 7, Pythen 3.8 and the .NET SDK installed.
The next steps are:
You can use the command prompt (start as an admin):
After the installation close the command promt.
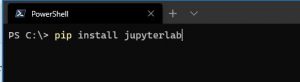
To install Jupyter Notebook with PIP use Powershell (start as an admin):
After the installation close .Powershell
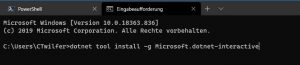
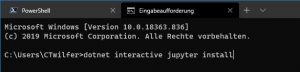
Now you must register the .NET Interactive with a command prompt (start as an admin):
The last step is to start Jupyter Notebook.
I have got myself a shortcut on the desktop first:
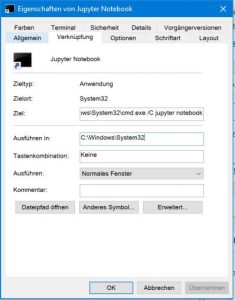
This is a shortcut to the command prompt. Add the extension ” /C jupyter notebook” to target and give the shortcut a name.
This completes the installation.
Next is the configuration of Jupyter Notebook for the use of Powershell Scripts, incl. all Az-Modules for this. To do this, start the created link. The web browser will open.
Next, we need to create a new notebook and specify the path to it.

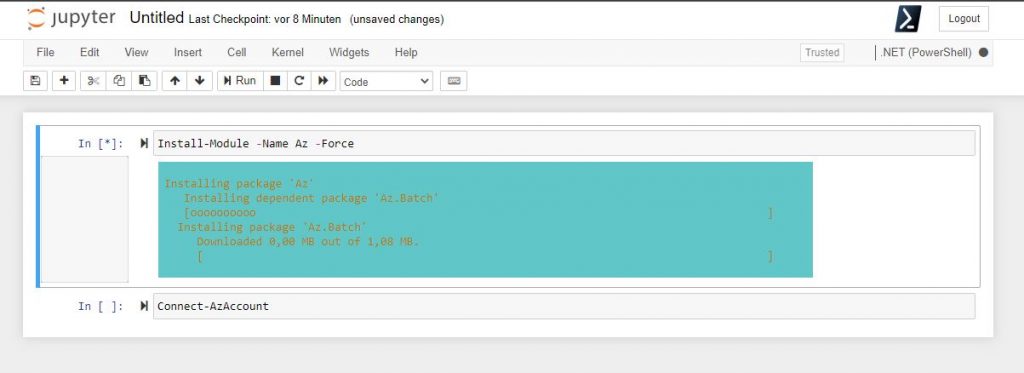
Next step is to import the Azure Powersell Modules.

Now klick Run and wait. In the line between [ ] there is now a *. That means, that this line is running.
After that is ready you can use this Notebook with your Powershell Code.
When you run the next line with: Connect-AzAccount you can connect to Azure.
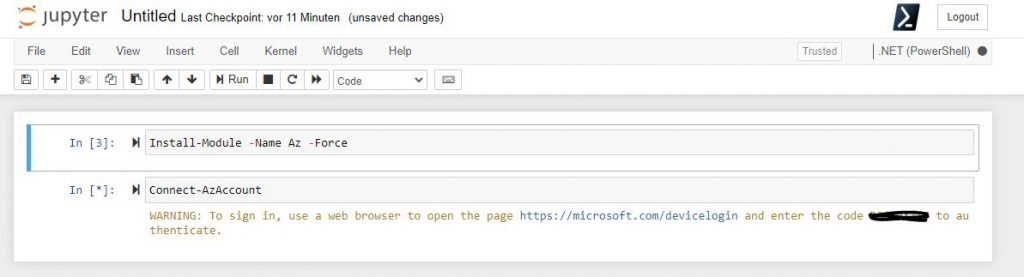
Go to the website and enter the code.
This is the hole guide for using Jupyter Notebook with Powershell.
At the end you can safe this Notebook to a folder in One Drive for Business, or MS Teams. Or you can install Jupyter Notebook in an Azure Virtual Machine.
Let your mind run wild… 😉